Creating a thriving outdoor canning kitchen can feel like a dream come true for anyone passionate about gardening and preserving food. With the summer sun shining and fresh produce from your garden ready to be transformed, the idea of making your own preserves is both exciting and rewarding. That’s why I put together this post—because there’s something truly special about bringing those garden delights indoors through canning. If you’ve ever found yourself pondering how to take your preserving game up a notch, you’re not alone!
This guide is crafted for urban homesteaders and gardening enthusiasts who want to make the most of their outdoor spaces. If you love getting your hands dirty in the garden, enjoy cooking from scratch, and are eager to embrace sustainable living, this post is for you. You’ll discover 10 innovative outdoor canning kitchen ideas that are not only functional but also inspiring. These designs will help you create a space that’s perfect for canning, blending style with practicality.
By diving into these canning kitchen ideas, you’ll learn how to set up a DIY canning station tailored for your needs. From cozy gathering areas to stylish storage solutions, this guide offers practical tips and inspiration for a design that reflects your personality. You’ll not only find ways to streamline your canning process but also create a beautiful outdoor space that can be enjoyed year-round. Let’s explore these ideas that will elevate your preserving experience and connect you even more with the garden-to-table lifestyle!
Key Takeaways
– Explore creative outdoor kitchen designs that enhance your canning experience while making the most of your garden space.
– Discover practical canning preservation tips that will help you efficiently process and store your harvest.
– Learn how to set up a DIY canning station that is both functional and reflects your unique style.
– Find inspiration for integrating shade and comfort features to make your outdoor space inviting and enjoyable.
– Understand the importance of seasonal decor and using natural materials to create a charming outdoor canning kitchen.
Recommended Products

【Durable 2 Layer Design】 -This heavy duty table desktop load capacity is 480 lbs, and the undershelf can carry 380 lbs. Its strong load - bearing capacity can easily carry microwave oven, kitchen utensils or any other tools.Dimension 24 by 48 by 34.7 inches (DxWxH), offer you enough storage room

【Durable 2 Layer Design】-This heavy duty table desktop load capacity is 420 lbs, and the undershelf can carry 320 lbs. Its strong load - bearing capacity can easily carry microwave oven, kitchen utensils or any other tools.Dimension 24 by 30 by 34.7 inches (DxWxH), offer you enough storage room

【Durable 2 Layer Design】 -This heavy duty table desktop load capacity is 500 lbs, and the undershelf can carry 400 lbs. Its strong load - bearing capacity can easily carry microwave oven, kitchen utensils or any other tools.Dimension 24 by 60 by 34.7 inches (DxWxH), offer you enough storage room
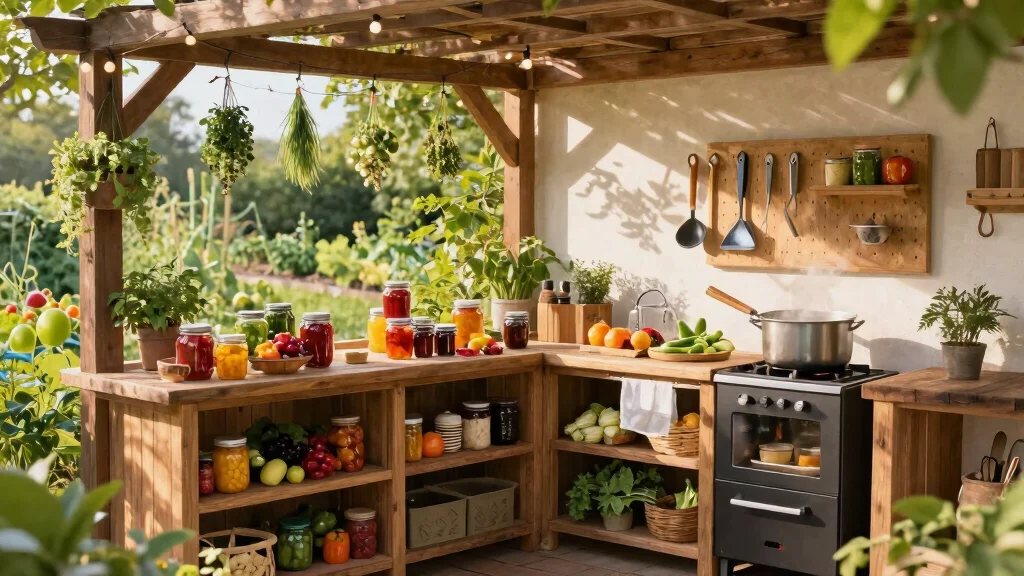
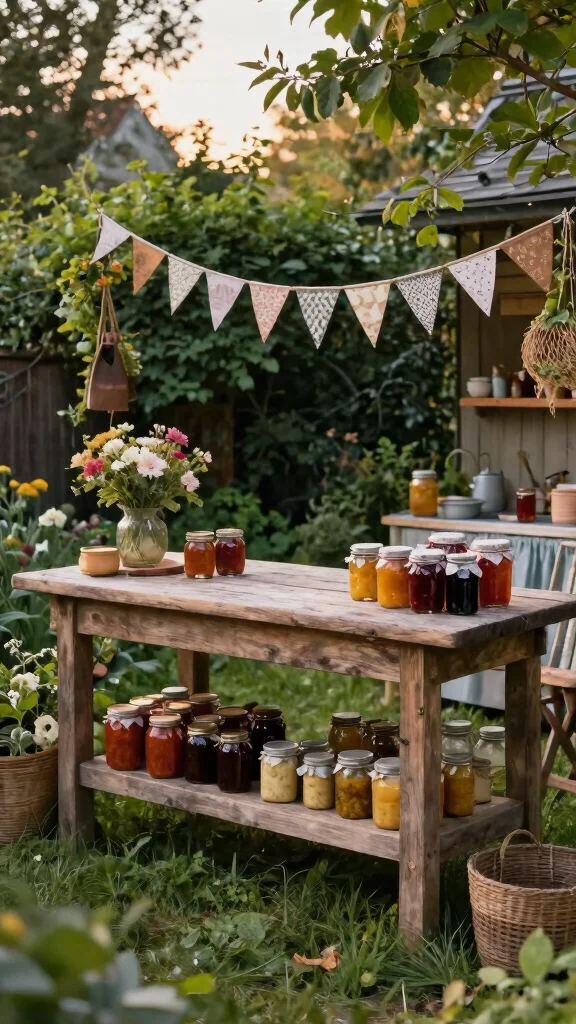
1. Rustic Wooden Workbench
Imagine a sturdy rustic wooden workbench, perfect for your outdoor canning adventures. It offers ample space for all your prepping needs, from chopping ingredients to organizing jars. The natural wood not only adds charm but also brings a warm, inviting vibe to your garden.
Enhance its functionality with built-in shelves for storing canning supplies like lids and rings, keeping everything organized and accessible. You can even add hooks for your tools and a small compost bucket for easy scrap management, making your workspace eco-friendly and efficient.
To add a personal touch, decorate the bench with fresh herbs or vibrant flowers in mason jars, and perhaps a small chalkboard for jotting down your favorite recipes. This thoughtful setup combines practicality with a splash of personality.
– Use reclaimed wood for sustainability.
– Integrate shelves for extra storage.
– Personalize with plants or decor.
❝ Fun fact: a sturdy outdoor canning kitchen workbench with built-in shelves can cut prep time by up to 30% by keeping lids, jars, and tools within arm’s reach. Add hooks for utensils and a small compost bucket, and cleanup becomes effortless.
Recommended Products

Vintage Design: The farmhouse cabinet features long pull metal handles and wood cross-shaped glass doors, evoking a vintage feel, and adding character to your interior.

DUAL SIZES: Includes two organizers - one for regular mouth lids (2.75 inch/70mm) and one for wide mouth lids (3.39 inch/86mm) for versatile storage options
2. Built-in Outdoor Stove
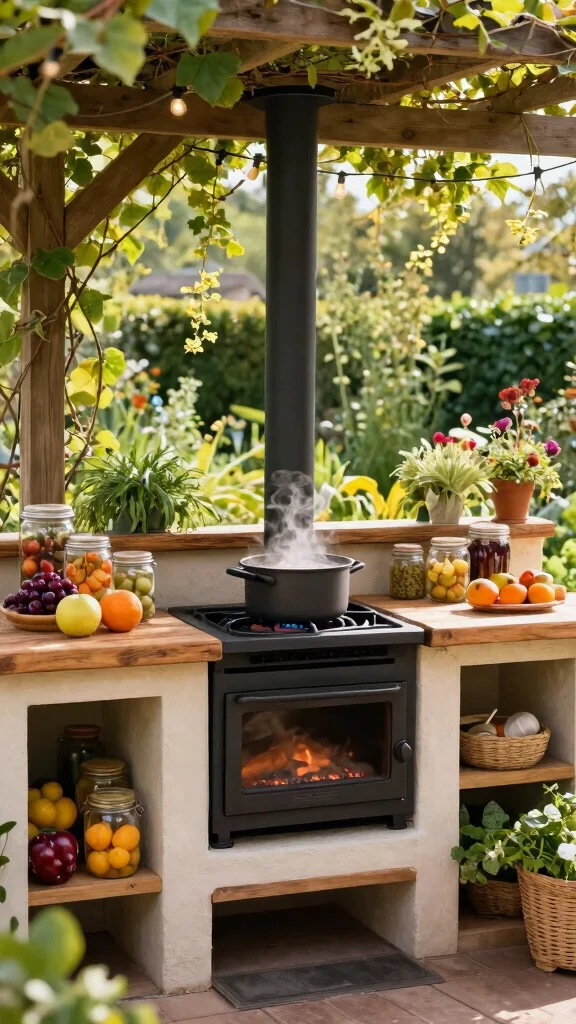
Imagine the freedom of a built-in outdoor stove as you preserve your garden bounty. This setup keeps your canning activities cool and efficient, avoiding the heat of the indoors. A two-burner model is ideal for handling multiple tasks, whether you’re boiling water or cooking down fruits.
Position it under a pergola or shaded area, protecting you from the elements while you work. This way, you can focus on your canning without worrying about indoor messes. Plus, it’s a lifesaver on hot summer days when the last thing you want is a hot kitchen.
For added convenience, ensure a nearby water source for easy access during the canning process.
– Choose a model with two burners for efficiency.
– Install in a shaded area for comfort.
– Keep a water source nearby for convenience.
Recommended Products

12" Stainless Steel Canning Rack From Concord. NOT A UNIVERSAL FIT.

Aieve Mason jar lids organizer are made of ABS material, safe and durable. 4 pack in a set for both wide mouth and regular mouth lids.

Package Includes: you will receive an M canning jar lids holder, a canning jar lids holder and 2 canning rings holders. The mason jar lid organizer kit can hold up to 38 lids and 34 rings, so you'll never have to worry about storing mason jar lids and rings again
3. DIY Canning Station
Creating your own DIY canning station is a fun and rewarding project that personalizes your outdoor kitchen. This space is where all the canning magic occurs, so consider using a portable table that you can easily store when not in use.
Mixing different heights for various tasks—like a lower table for prep and a higher one for filling jars—can enhance your workflow. Use commercial shelving and wooden crates to design a flexible setup tailored to your needs. Don’t forget to label everything to stay organized during the busy canning season!
Adding wheels to your station allows for easy movement, positioning it closer to your garden beds when necessary. This clearly defined area streamlines the canning process, preventing chaos.
– Use a portable table for flexibility.
– Incorporate different heights for tasks.
– Keep organized with labels for easy access.
Recommended Products

【Durable 2 Layer Design】 -This heavy duty table desktop load capacity is 420 lbs, and the undershelf can carry 320 lbs. Its strong load - bearing capacity can easily carry microwave oven, kitchen utensils or any other tools.Dimension 24 by 30 by 34.7 inches (DxWxH), offer you enough storage room
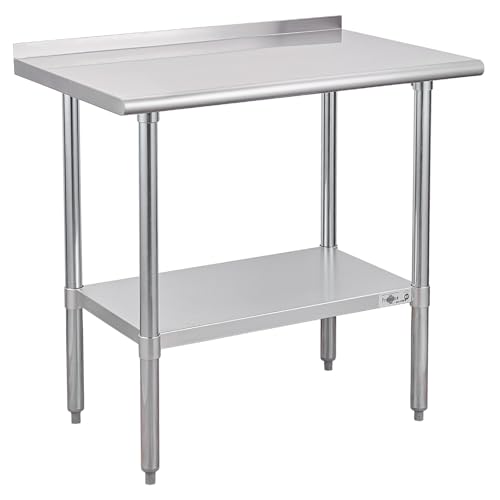
Advanced Stainless Steel: 18-gauge type 430 stainless steel work table, corrosion and wear resistant, and also will not easily deformed. Smooth surface is easy to clean, and the 1 1/2 Inches backslash effectively protects your walls from scratches and dirty water, ensuring a clean and tidy kitchen

Modern Design: Classic style outdoor bench with storage provides a place for potting plants, with shelf space for tools, gardening supplies, or small gardening equipment
4. Cozy Gathering Area
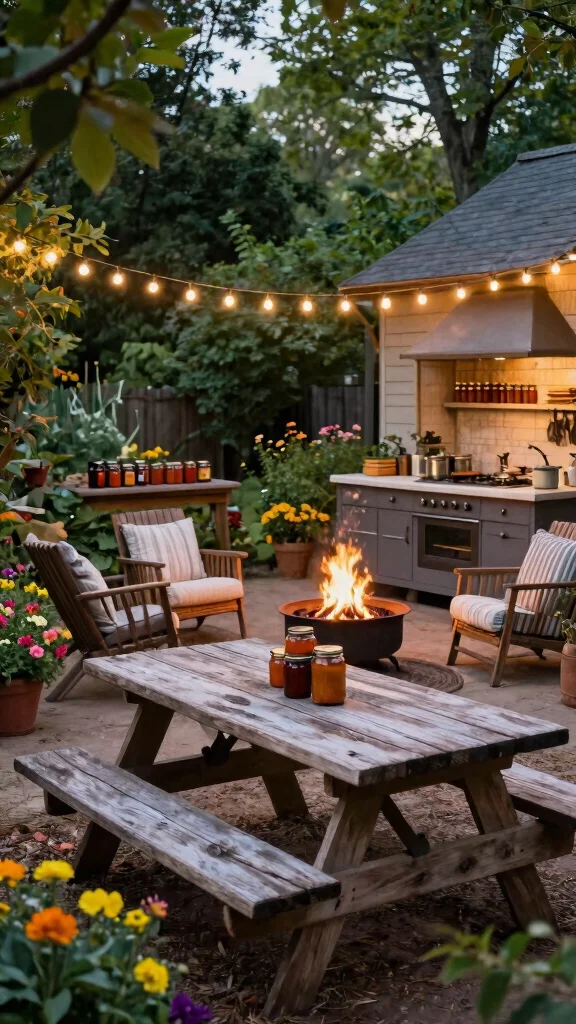
After a long day of canning, having a cozy gathering area is a must. It’s the perfect spot to unwind, share stories, and enjoy the fruits of your labor with loved ones. Consider adding a rustic picnic table or a few comfy chairs amidst blooming flowers for a delightful ambiance.
A fire pit can enhance the warmth, making it an ideal gathering spot even as the evening cools. Picture roasting marshmallows and brainstorming ideas for next year’s garden as the sun sets. String lights overhead can create a magical atmosphere, perfect for late summer evenings.
Add outdoor cushions or cozy blankets for extra comfort, transforming this area into an extension of your kitchen where canning meets relaxation.
– Design a comfortable seating area.
– Add a fire pit for warmth and ambiance.
– Use string lights for a magical touch at night.
5. Vertical Garden for Easy Access
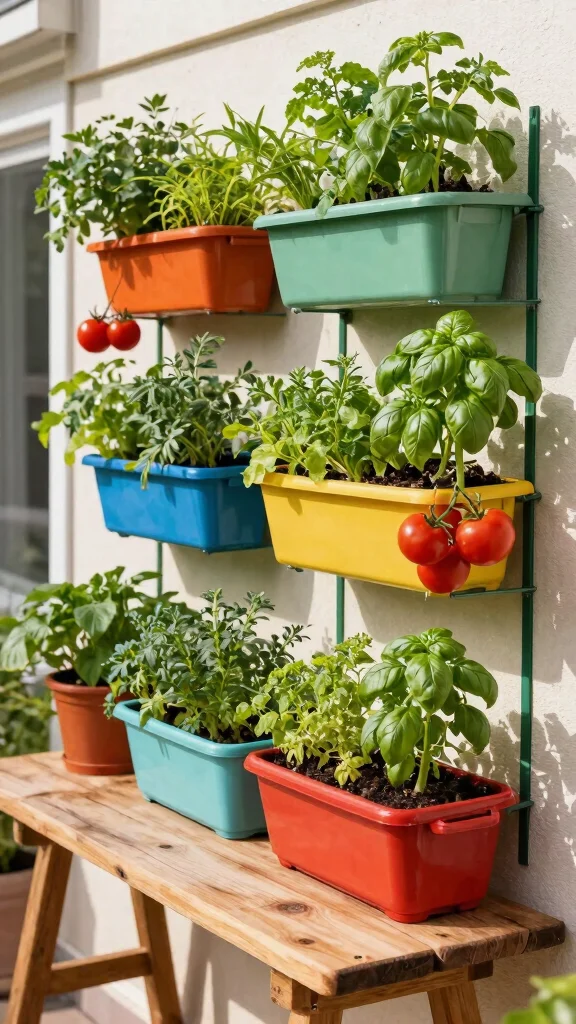
Imagine a beautiful vertical garden right in your outdoor canning kitchen, maximizing space while providing easy access to fresh ingredients. This stunning setup not only enhances your kitchen’s aesthetics but ensures you have herbs, fruits, and vegetables at your fingertips.
Choose a sunny wall or fence to mount planters or shelves, saving ground space and making harvesting a breeze—no more bending down to fill jars! A mix of planters, hanging baskets, or repurposed pallets can create a unique look.
Consider growing essential herbs like basil, thyme, and mint, enhancing your canning recipes. Installing a drip irrigation system will ensure your plants stay hydrated, especially during those hot summer days.
– Utilize a sunny wall or fence for mounting planters.
– Mix planters for a unique design.
– Install a drip irrigation system for easy maintenance.
Recommended Products

Holds 2 quarts, 4 half pints or 4 one pint canning jars

[2 Racks for 6 Mason Jars]: Storage and organize your Mason jar food under/inside the cabinet, shelf, pantry, and baker rack, These simple solutions for freeing up and utilizing kitchen space

Dual-Size Convenience: This set provides two distinct racks - one for regular mouth lids and one for wide mouth lids - so you can seamlessly switch between small and large canning jars, keep canning jar lids neatly stored, and ensure no lid is ever misplaced during your canning adventures.
How To Choose The Right Outdoor Canning Kitchen
Choosing the perfect outdoor canning kitchen is essential for serious preservers like you. It’s not just about aesthetics; functionality and convenience matter too. Here are some key factors to consider when setting up your outdoor canning station.
1. Size Matters
Before you start designing, measure your space. Consider how much room you’ll need for your canning equipment, work surfaces, and storage. A compact kitchen might work for simple canning tasks, while a larger one allows for more equipment and amenities. Depending on your garden size, a workspace of 6-10 feet can be ideal for most canning needs.
2. Material Choices
The materials you choose should withstand the elements. Look for weather-resistant options like treated wood, stainless steel, or composite materials. These options are durable and can handle spills and heat from the stove. For example, a stainless steel workbench resists rust and is easy to clean.
3. Essential Features
Your outdoor canning kitchen should include features that enhance your preserving experience. A built-in stove or hot plate is crucial for cooking jars. Other useful features may include a prep sink for washing produce and a countertop for arranging supplies. Ensure you also have enough electrical outlets for your equipment.
4. Budget Considerations
Planning your budget helps prioritize features. Determine how much you can spend on materials, appliances, and decorative elements. If you’re on a tight budget, consider DIY options like building your own workbench or repurposing materials from your garden. Set aside funds for essentials first, then think about added comforts like seating or decorative touches.
5. Organization and Storage
A well-organized canning kitchen saves you time and effort. Plan for plenty of storage solutions, like shelves or cabinets for jars and tools. Color-coded bins can help you quickly find supplies, while labeled containers keep everything neat. Make sure your kitchen layout allows easy access to frequently used items.
6. Comfort and Shade
Working outdoors means considering comfort. Look for ways to add shade to your space, such as canopies or trees. A comfortable chair or bench nearby lets you take breaks. If you can, position your kitchen close to your garden for easy access to fresh ingredients.
Pro Tip: Think about your typical canning season. You may need more shade in the summer and wind protection in the fall. Plan your layout to adapt to the changing seasons, ensuring your outdoor canning kitchen is a year-round usable space.
With these guidelines, you can create an outdoor canning kitchen that meets your preserving needs and enhances your gardening experience. Happy canning!
Recommended Products
DIMENSIONS: Exterior: 52. 7 in. W x 20. 5 in. D x 35. 5 in. H / Interior: 40. 9 in. W x 16. 3 in. D x 18. 5 in. H

Multipurpose Worktop: Made from stainless steel, the 34" L x 20" W tabletop facilitates an ideal workplace to serve both indoor and outdoor cooking needs, like preparing food aside when cooking

GRILLING PREP STATION: Portable prep station with 2 drop leaf extensions fits well in any outdoor décor thanks to its decorative design
6. Water Source Integration
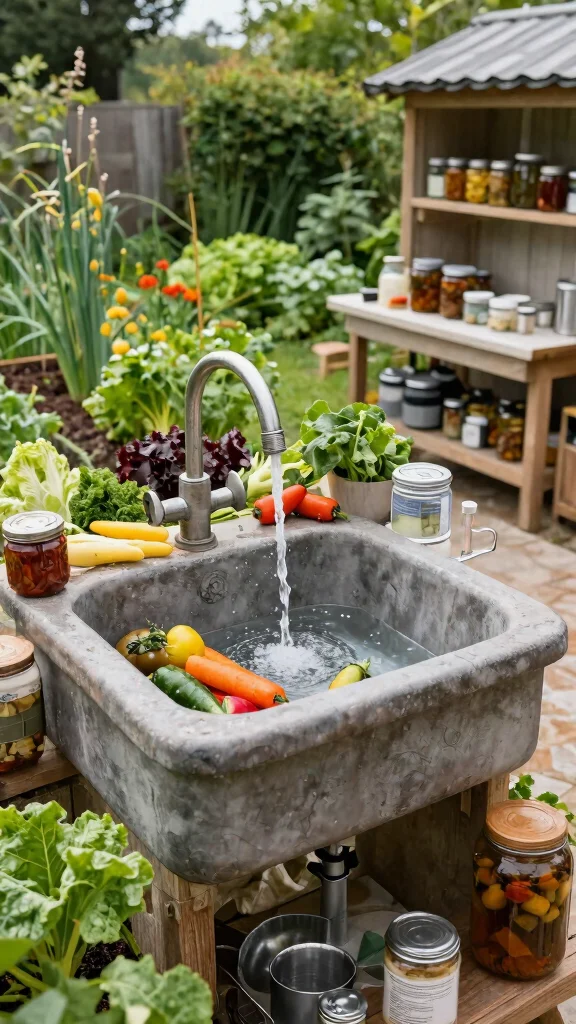
A reliable water source is crucial in your outdoor canning kitchen for efficiency and cleanliness. Whether it’s a garden hose or a small sink, easy access to water makes the canning process smoother and more enjoyable.
Installing an outdoor sink with a faucet near your canning station can be a game-changer. If you prefer a rustic touch, a large water container with a spout can work great. Having a designated washing area for your produce ensures everything is clean before you start boiling.
This convenience can spark spontaneous canning sessions since all your essentials are within reach. Just remember to include a drainage system for hassle-free cleanup after those busy canning days.
– Install an outdoor sink for convenience.
– Use a hose if a sink isn’t practical.
– Include a drainage system for easy cleanup.
Recommended Products

HIGH-POWER 87,000 BTU COOKING PERFORMANCE - Three independent propane burners deliver a combined output of up to 87,000 BTU, providing fast, even heat for boiling, frying, grilling, seafood boils, canning, and large-batch outdoor cooking.

PREP & COOK: Spacious 48" x 24" stainless steel worktop provides ample space, with one side accommodating up to a 24" x 24" grill and the other side dedicated to food preparation.

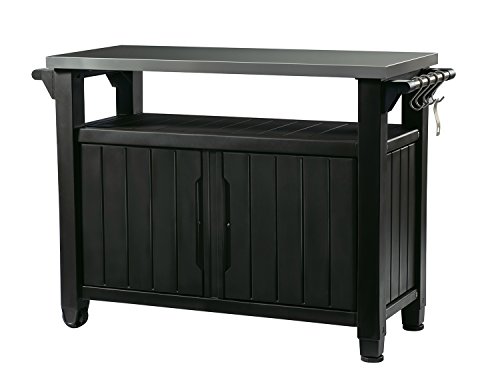
【Material Quality】 Outdoor grill cart is made of cold rolled steel steel construction with a load capacity of up to 180 lbs, the sturdy steel structure ensures it is extremely stable. The surface of the cart is treated with high-grade powder coating, smooth and easy to clean.Ideal as a outdoor grill station or outdoor prep table, it brings unrivaled convenience to your outdoor grilling setup.
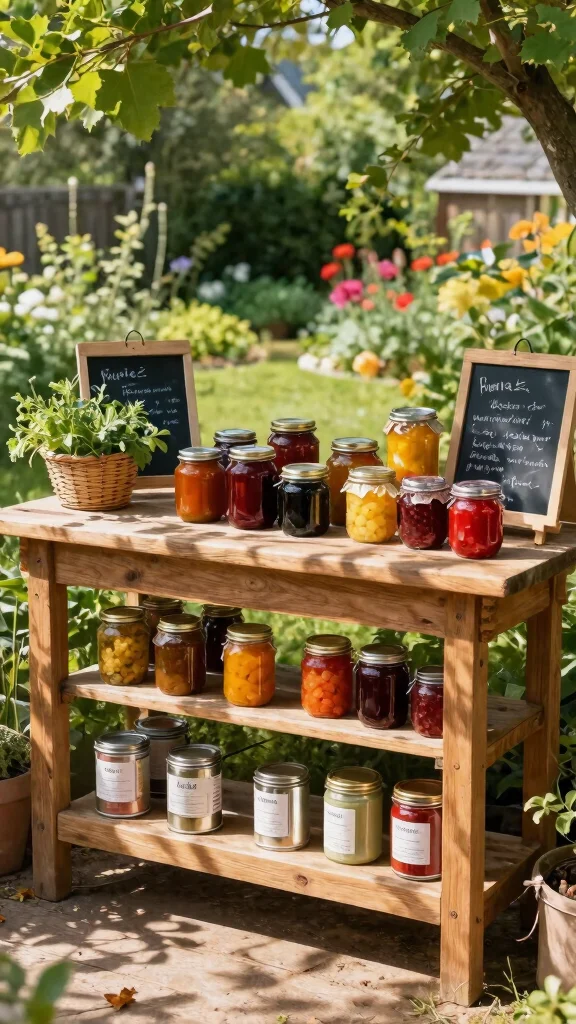
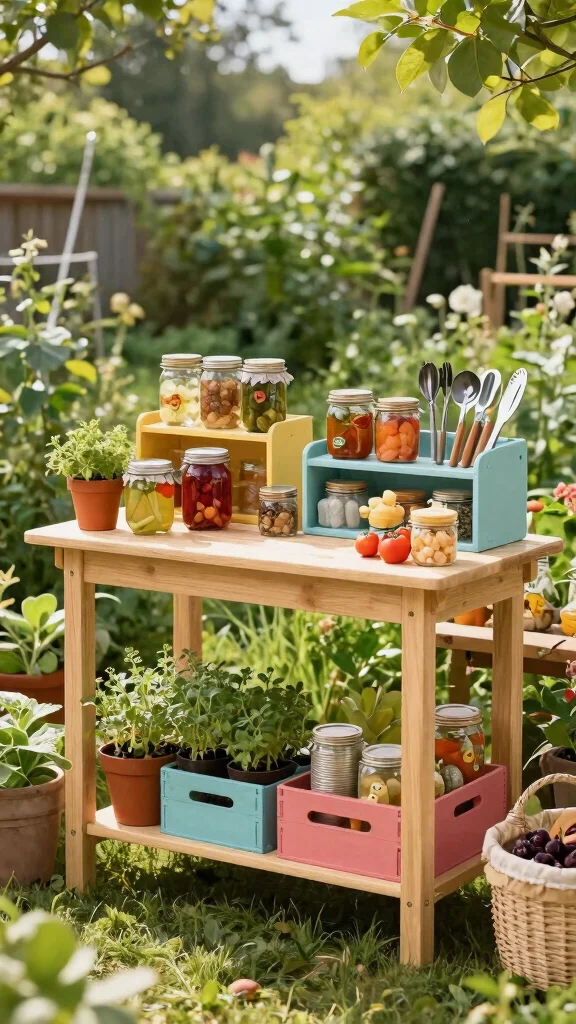
7. Colorful Storage Solutions
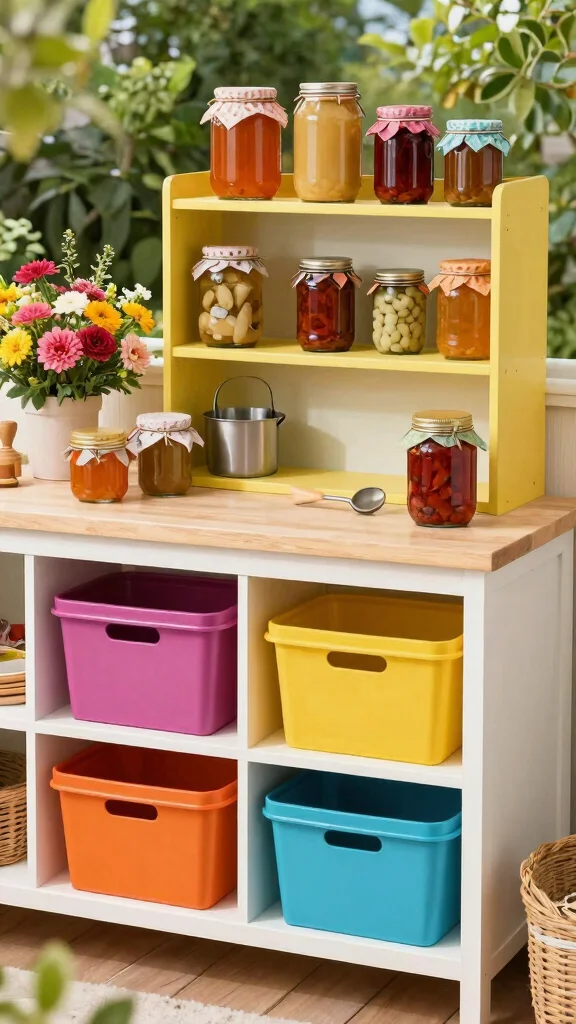
Your canning kitchen can be both functional and visually appealing with colorful storage solutions. Brightly painted bins and woven baskets can hold your jars while adding a pop of color to your outdoor space.
Different colors can represent various categories, making it easy to locate what you need quickly. For instance, designate a vibrant red bin for fruits, a green one for vegetables, and a blue one for tools. Clear containers can also enhance visibility, combining organization with charm.
By incorporating these colorful storage options, you’ll create a joyful environment that inspires creativity as you embark on your preserving adventures.
– Use colorful bins for different categories.
– Add clear containers for easy visibility.
– Incorporate vibrant shelving for a joyful atmosphere.
Fun fact: In an outdoor canning kitchen, color-coded storage can cut jar retrieval time by up to 30% on busy days. Keep vibrant bins for fruits, greens for vegetables, and clear containers to spot what’s inside—organized storage speeds serious preserving.
Recommended Products

Fit for Pergola Structures Up to 17x7.4 Ft: This 85"x208" shade cover fits a wide range of household pergolas up to 17x7.4ft, working seamlessly with both flat-top and curved styles. It’s the ideal replacement to bring back cool shade and refresh the look of your outdoor space.

Note: Accessories have been updated from [Zip-ties, Ropes, Bungee Balls] to [Zip-ties, Ropes, Bungee Hooks]. New and old packages shipped randomly. [90% Sun Protection] BELLE DURA Sun Shade Cloth offers blocking up to 90% harmful UV rays and direct sun lights, effective cooling of about 50-60 ℉, giving a sense of privacy while blocking sunlight.
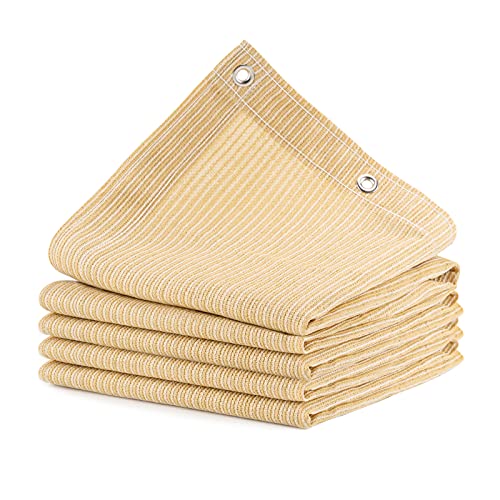
Premium Sun Shade Cover – Designed to attach to a large outdoor deck, pergola, or patio space to block harsh UV sun rays and keep you cool all summer long this sun shade cloth offers 90% UV protection without sacrificing cool air breathability.
8. Shade and Comfort Features
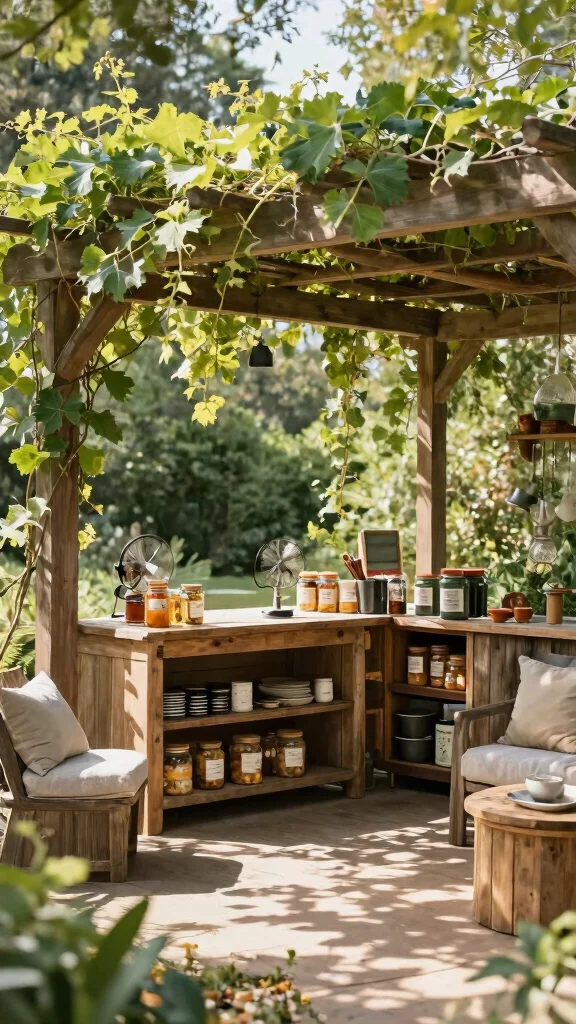
Creating a comfortable environment for canning, especially during the hot summer months, is essential. Adding shade and comfort features can significantly enhance your outdoor kitchen experience.
Consider planting trees or installing a sturdy pergola to provide shelter from the sun while you work. Outdoor fans or misters can help keep the air cool, allowing you to enjoy canning without overheating. Comfy seating areas with cushions can provide a perfect spot to relax during breaks.
Using light-colored materials for your setup can also reflect sunlight, keeping your space cooler. Prioritizing comfort ensures that canning becomes a delightful task rather than a chore.
– Build trees or pergolas for natural shade.
– Install outdoor fans or misters for comfort.
– Use light-colored materials to reflect sunlight.
9. Seasonal Decor with Function
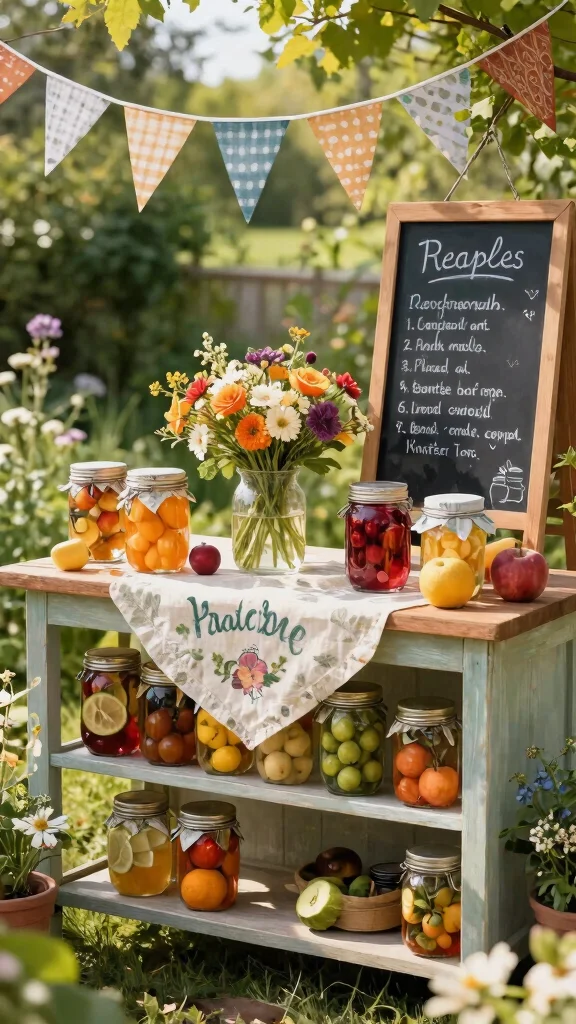
Enhance your outdoor canning kitchen with seasonal decor that serves both a decorative and functional purpose. Festive decorations like mason jar centerpieces filled with seasonal fruits or vibrant flowers can brighten your workspace.
Consider hanging decorative bunting or wreaths that reflect the current season, creating an inviting atmosphere for your canning activities. A chalkboard can serve as functional decor, perfect for jotting down seasonal recipes or reminders. This adds a personal touch while keeping you organized.
By rotating your decorations with the seasons, you can maintain a fresh and inspiring space throughout the year.
– Incorporate seasonal decor like jar centerpieces.
– Use chalkboards for recipes and reminders.
– Rotate decorations with the seasons for freshness.
Fun fact: Seasonal decor in your outdoor canning kitchen can boost efficiency by 28% — bright mason jar centerpieces and a chalkboard speed up recipe notes. Keep it practical: swap decorations weekly to reflect harvests and cut prep time.
10. Utilize Natural Materials
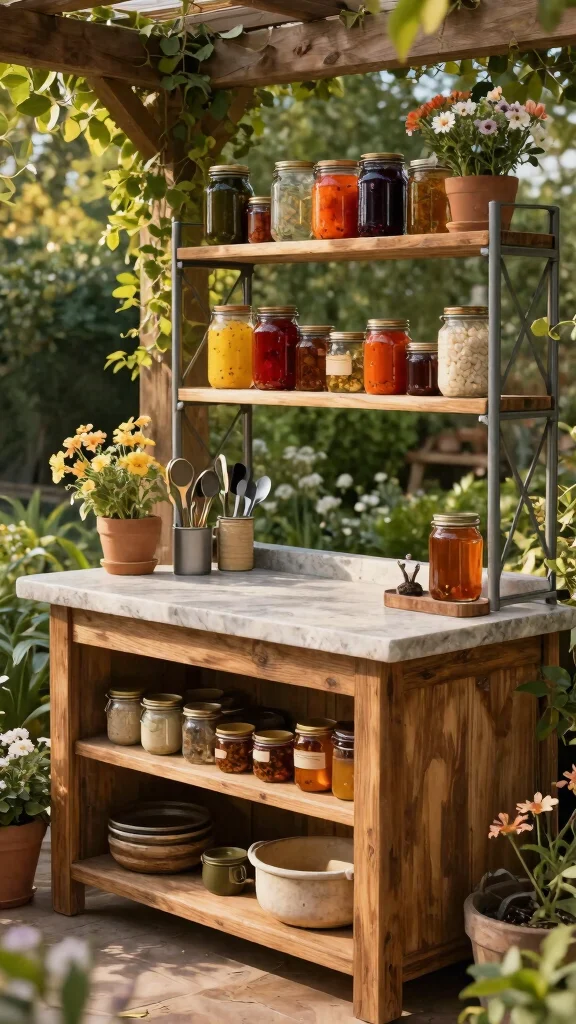
Using natural materials in your outdoor canning kitchen creates an inviting and sustainable environment. This approach not only enhances the aesthetic but also aligns with eco-friendly principles.
Consider incorporating materials like stone for countertops or pathways, wood for tables and chairs, and metal accents for shelving or tools. The combination of these elements showcases a rustic yet sophisticated vibe, perfect for urban homesteading enthusiasts.
Natural materials age beautifully, giving your outdoor kitchen character over time. This thoughtful integration helps create a welcoming atmosphere, making every canning session feel special.
– Use stone for countertops or pathways.
– Incorporate wooden furniture for warmth.
– Add metal accents for a rustic touch.
Conclusion
Designing an outdoor canning kitchen is an exciting way to enhance your preserving experiences while embracing sustainable gardening practices. From a rustic workbench to the perfect gathering spot, each idea contributes to a beautiful, functional space that reflects your passion for canning.
As you explore these ideas, think about how each element can fit into your outdoor oasis, enhancing both your gardening journey and your culinary creativity. Happy canning, and may your kitchen be filled with the joy of homegrown goodness!
Note: We aim to provide accurate product links, but some may occasionally expire or become unavailable. If this happens, please search directly on Amazon for the product or a suitable alternative.
This post contains Amazon affiliate links, meaning we may earn a small commission if you purchase through our links, at no extra cost to you.
Frequently Asked Questions
What is an outdoor canning kitchen and why is it great for serious preserving, especially for urban homesteaders?
An outdoor canning kitchen is a dedicated space outside your home for prepping, processing, and preserving foods using canning methods. For urban homesteaders, it keeps heat, steam, and strong odors out of the house while keeping everything you need within reach of your garden. Practical benefits include safer canning with better ventilation, a more comfortable workflow in warm months, and a true garden-to-table rhythm. When designing, prioritize an outdoor kitchen design that fits your space, a clear layout for outdoor canning kitchen activities, and sturdy storage for jars and lids. Practical elements include a prep table, heat source, water access, proper drainage, and weatherproof surfaces.
What should a DIY canning station include in an outdoor kitchen for serious preserving?
A well-equipped DIY canning station keeps you organized and safe. Include: a sturdy prep table and weatherproof surfaces, a heat source (propane burner or outdoor stove), a rack or shelves for jars, a water bath canner or pressure canner if needed, a dedicated area for boiling water, a drain and splash guards, a sink or water source, jars, lids, rings, funnels, jar lifter, tongs, a headspace gauge, thermometer, drying rack, towels, labels, marker, and a sanitation kit. Ensure space for cooling hot jars and staging after processing. Design with outdoor kitchen design principles in mind to promote safety and efficient workflows.
How can outdoor kitchen design improve safety and efficiency when canning?
Safety starts with a stable, level workspace and good ventilation. Build a shaded, weatherproof area with non-slip flooring and wind protection for steam. Separate heat zones from food prep, store jars and lids away from the heat source, and keep a fire extinguisher handy. Install weatherproof shelving, use GFCI outlets for any electric equipment, and ensure an accessible water source with proper drainage. Adequate lighting and pest-proof storage help maintain efficient, garden-to-table canning routines.
What sustainable gardening practices complement outdoor canning and promote garden-to-table preserving?
Pair your outdoor canning with sustainable gardening practices like smart crop planning, crop rotation, and planting for peak harvest windows to maximize canning efficiency. Collect rainwater for washing jars and rinsing produce, compost kitchen scraps to enrich soil, and use energy-efficient canning methods. Reuse glass jars and lids when safe, preserve surplus to reduce waste, and label batches clearly to support a circular garden-to-table workflow powered by sustainable gardening practices.
What are essential canning preservation tips for beginners in an outdoor canning kitchen?
Start with tested recipes and follow official guidelines to ensure safety. Key tips include checking altitude adjustments for processing times, using proper headspace, sterilizing jars, and ensuring seals are secure after processing. Label each batch with date and contents, store in a cool, dark place, and rotate stock to use older jars first. Keep a sanitation routine and clean workspace to maintain quality in your outdoor canning kitchen and empower your garden to table preserving.
Recommended Products

Selected Material for Durability: Constructed from top-quality waterproof material for long-lasting performance

Weighted Rods Included: Shade&Beyond pergola shade cover is equipped with stainless steel rods on 2 sides, which weigh the cover down in times of high winds. It also designed with grommets on another 2 sides, making the shade easy to install with your pergola frame
UV Blocking and Privacy Protection: Made of 180GSM high-density polyethylene(HDPE) breathable sunshade fabric, with up to 95% UV blocking ability, keeping shaded areas cool. 90% visibility blocking, preventing see-through, free from outside interference, enjoy freedom.
Related Topics
outdoor canning kitchen
urban homesteading
DIY canning station
sustainable gardening
canning preservation tips
garden to table
outdoor kitchen design
seasonal preserving
beginner friendly
easy canning recipes
functional outdoor spaces
creative gardening solutions